Make Your Own Face Masks
Sew and No Sew Instructions
The Centers for Disease Control (CDC) recommends wearing cloth face coverings in public settings where other social distancing measures are difficult to maintain (e.g., grocery stores and pharmacies), especially in areas of significant community-based transmission.
Because masks are difficult to buy during a pandemic, the CDC has posted information on how to make your own. We are re-posting three of those options here for you. A Sewn Cloth Face Covering, a Quick Cut T-shirt Face Covering (no sew method) and a Bandanna Face Covering (no sew method).
Another great source of information about mask making is here at The Conversation: Making masks at home – what you need to know about how to reduce the transmission of coronavirus
Our Favorite Pattern is the Suay Face Mask
You can download a PDF file showing the SUAY FACE MASK Pattern here.
(All the information below is provided courtesy of the CDC.)
Sewn Cloth Face Covering
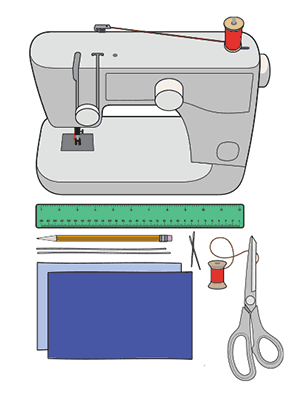
Materials
- Two 10”x6” rectangles of cotton fabric
- Two 6” pieces of elastic (or rubber bands, string, cloth strips, or hair ties)
- Needle and thread (or bobby pin)
- Scissors
- Sewing machine
Tutorial
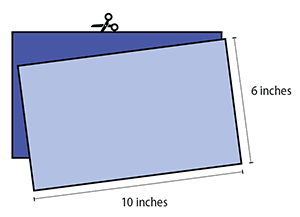
1. Cut out two 10-by-6-inch rectangles of cotton fabric. Use tightly woven cotton, such as quilting fabric or cotton sheets. T-shirt fabric will work in a pinch. Stack the two rectangles; you will sew the mask as if it was a single piece of fabric.
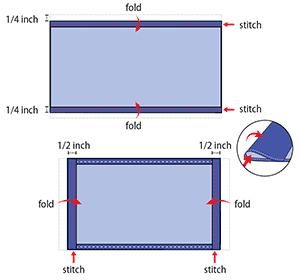
2. Fold over the long sides ¼ inch and hem. Then fold the double layer of fabric over ½ inch along the short sides and stitch down.
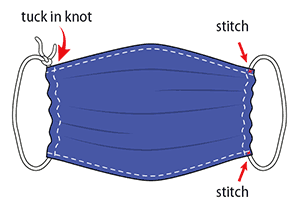
3. Run a 6-inch length of 1/8-inch wide elastic through the wider hem on each side of the mask. These will be the ear loops. Use a large needle or a bobby pin to thread it through. Tie the ends tight.
Don’t have elastic? Use hair ties or elastic head bands. If you only have string, you can make the ties longer and tie the mask behind your head.
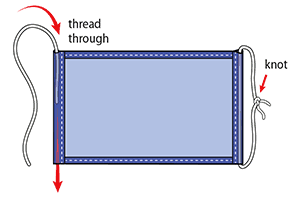
4. Gently pull on the elastic so that the knots are tucked inside the hem. Gather the sides of the mask on the elastic and adjust so the mask fits your face. Then securely stitch the elastic in place to keep it from slipping.
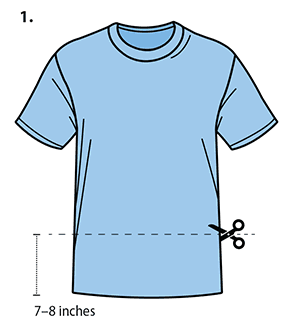
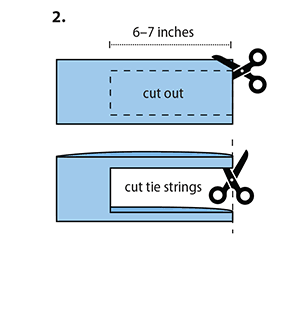
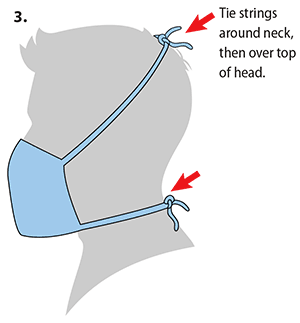
Quick Cut T-shirt Face Covering (no sew method)
Materials
- T-shirt
- Scissors
Tutorial
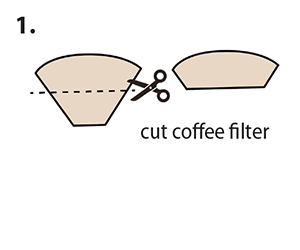
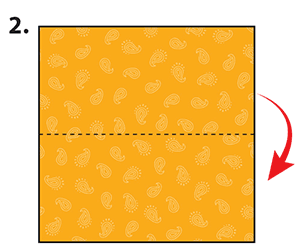
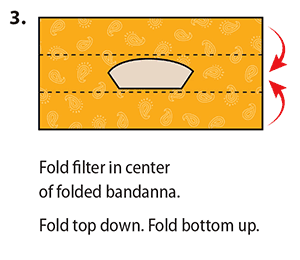
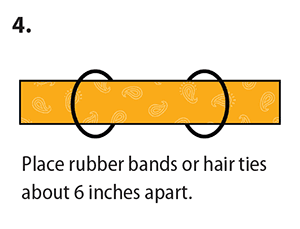
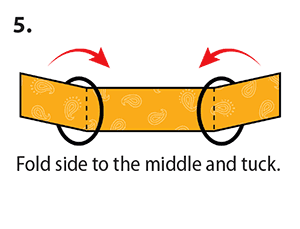
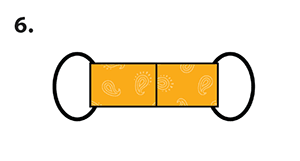
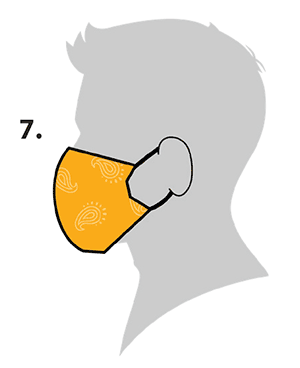
Bandanna Face Covering (no sew method)
Materials
- Bandanna (or square cotton cloth approximately 20”x20”)
- Coffee filter
- Rubber bands (or hair ties)
- Scissors (if you are cutting your own cloth)
Tutorial
Call for a FREE Consultation (305) 296-3434
CAUTION: Check with your doctor before
beginning any diet or exercise program.
4/7/2020


